• Skip to primary navigation
  • Skip to main content
  • Skip to primary sidebar

Commercial Photographer New York

  • Commercial Photography, New York
  • About Us
  • News

Studio Blog

  • Home
  • About
  • Blog
  • Contact

Keeping it Fresh

February 24, 2017 By photosynth1

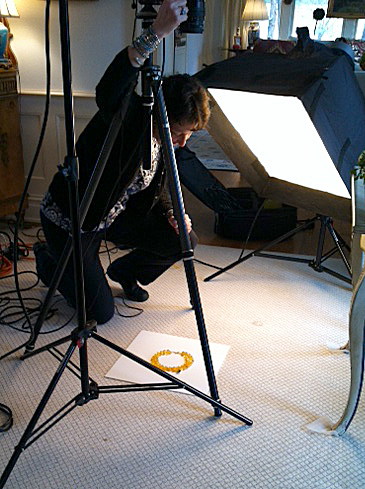
When you’ve been doing something for a long time, it’s easy to become complacent and stay with what you know instead of exploring new trends and technologies. I’ve spent a lot of time pondering this over the past few years and have come to the realization that, while it may be comforting to stick with the status quo, it certainly doesn’t help to fan the flame of creativity. We all need to take creative risks to keep our work fresh and our interest in it strong. Sometimes this means trying things that are outside of our comfort zone and waiting to see what happens. I’ve had several experiences like this, and while they haven’t all been successful, I’ve learned a lot from all of them.


I started teaching photography classes to kids at a local art center about 8 years ago. At the time, the Director asked if I would also teach adults. I politely declined, telling her that I was, in fact, mentally closer in age to the 13 year olds in the class. The fact was I was afraid that I’d be faced with questions I couldn’t answer if I taught adults. It took several years of teaching kids before I tried teaching an adult class through a library. I soon discovered that it was exactly the same as teaching kids and that my fears were unfounded. I now teach 3 sessions of classes each semester through the Continuing Education program at my local high school. The students are all enthusiastic and eager to learn, and I found that teaching reminds me why I love what I do so much. I’m inspired by their work, which in turn makes mine better.


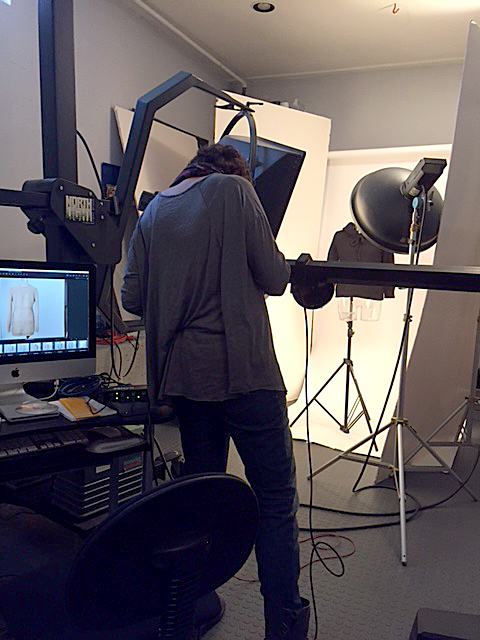
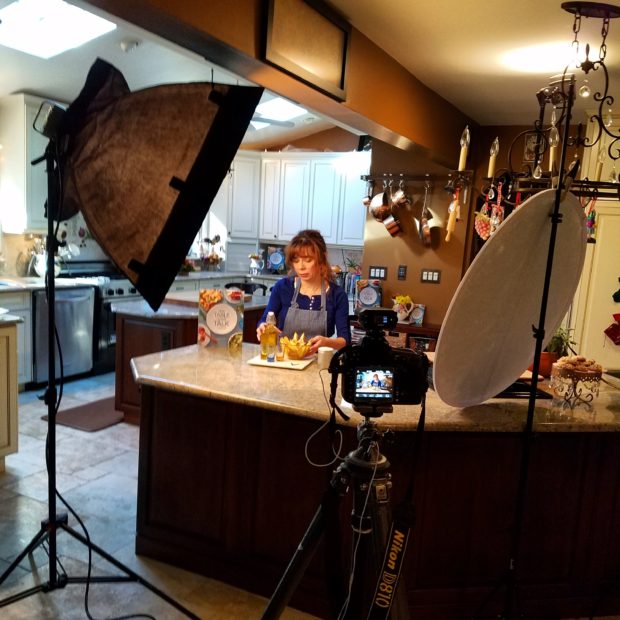
A good friend of mine is a food stylist and recipe developer. We met long ago during a food shoot, and we’ve remained friends and worked together ever since. For years we talked about how she needed to write a cookbook, and the joke was always “before I turn….” (Fill in the blank for an appropriate age). Needless to say, the years went by without the cookbook, until one day she decided to start. It became her passion project, taking 4 years to complete. The end result is beautiful and it’s been well received. She’s working on the marketing and we are collaborating on shooting video tutorials, along with still photos of the finished recipes. I haven’t shot video since my school days, and it’s been an amazing learning experience for both of us. We have found new skills and new ways of sharing our work. Our collaboration has helped to keep my creative fire burning, in turn keeping me interested in my work.


It’s been a long time since I was in school and had the rush that comes from learning something new and exciting. It finally dawned on me that there’s something new in photography every day, and I can get excited about that! That’s keeping it fresh.


Filed Under: Studio Blog

We’re back at NRHS for spring photo classes!

February 22, 2016 By photosynth1

I’ll be teaching again through the Adult Ed program this spring, and I’ve added a second class to round out your “Art of Photography” experience.  While the first class helps get your creative juices flowing, Part 2 is going to help bring you up to speed on the workings of your digital camera.  Don’t worry that it will be technical and boring, though…it’s all about having fun while gaining a better understanding of how your camera works.  Registration is going on now…check it out at www.nrhs.nrcsd.org!

Amazing photo by 16 year old Danielle, a student in one of my teen classes

Filed Under: Studio Blog

Stalking the elusive photographer

September 22, 2015 By photosynth1

1 23 4

A friend of mine remarked recently that there are no photos of me on my company’s website or social media pages, and she thought it odd, considering my occupation as a photographer. I joked that the whole reason I became a photographer was to avoid having my picture taken. This was obviously in the years before “selfies” became ubiquitous.

When the studio I worked for built their first website, we were told that we’d need to include portraits on the “About Us” page. My boss was even more camera shy and reluctant than I was to have his photo taken, so we opted to use photos of ourselves as children. I scanned the images and Photoshopped our first cameras into each of the scenes. We almost got away with it. The web developer told us that was nice, but our current and potential clients would want to put a face with our names when considering us for potential work. We knew he was right, and decided that the only way it would happen was if we each took the other’s photograph. It was a painful process for both of us, but we eventually got it done. My boss retired years ago and closed the studio, and when I built the first website for my studio, I was faced again with the prospect of including a picture on the “About Us” page. Once again I was told that current and potential clients want to see who they’re talking to, and once again, I resisted. Since I’m the “boss”, I won.

It’s been a few years and website versions since then, and many things have changed. Our world has become increasingly more visual with the advent of social media platforms and instant messaging. At any given moment, we are bombarded with imagery from around the globe. It’s incredibly easy to create photographic content and broadcast it instantaneously, and we have come to expect frequent updates from family, friends, clients, and co-workers. The pace is crazy and ever-changing. Digital photography has also changed the way I work as a commercial photographer. Many of my clients ship their products to me, and all of our transactions are electronic. I have several clients whom I have never met in person, and many potential clients who find me through referrals and my online presence have no idea what I look like.  I realize the importance of connecting with my current and future clients, and understand the need to put a face behind my company, but I’m still camera shy.  It’s way more important to me that the stuff in front of the camera looks great, regardless of what things look like behind it.  Even though I’ve remained relatively anonymous in the digital world, I have not totally avoided being photographed. My clients all have social media accounts and, if we happen to be together, have been known to tweet about a shoot we’re doing, or post an image on Instagram of the set we’re working on. I’ve collected some of them and am including them here as proof that I exist in the digital realm. I’m hoping that they will satisfy the “About Us” photo requirement , and give current and future clients a glimpse into the world of this elusive photographer.


Filed Under: Studio Blog

New Adult Ed photography class at NRHS!

February 24, 2015 By photosynth1

220px-ModeDial


There’s still time to sign up for my new photography class through North Rockland High School’s Adult Ed program.  The Art of Photography is a 4 session class designed to spark your creativity and  bring out the photographer in you. The class will combine instruction and activities in order to expand your understanding of camera basics, composition, lighting, exposure, perspective and point of view.  The first class is Thursday, March 5th.  Sign up now and prepare to have fun with your camera!

Filed Under: Studio Blog

Product Photography for the fashion P.R. world

November 12, 2014 By photosynth1

I was recently interviewed for PRCouture, which is an online resource for fashion P.R. professionals worldwide.  The article was written by Lori Riviere of The Riviere Agency in New York.   Here’s a copy:

11.04.14 BY LORI RIVIERE Q & A with Product Photographer, Nancy Lenore of Photo Synthesis
Q & A with Product Photographer, Nancy Lenore of Photo Synthesis

Product Photography: What Fashion Designers & Publicists Need to Know

The publishing industry has undergone massive changes in the last 5-10 years and now product photography is even more critical for brands seeking to maximize editorial coverage. Online outlets need these images for quick and immediate content and print magazines have smaller budgets and often forgo editorial shoots that use the traditional editorial pull method. Having strong product images that media outlets can quickly drop into a feature with minimal editing can greatly increase chances of coverage with certain outlets. We sat down with one product photographer, Nancy Lenore, to learn more about the world of product photography and what she does to help brands make their mark.

Tell us about yourself. How long have you been doing product photography?

I started my career as a photojournalist in the Washington, D.C. area.  After almost 4 years of news photography, I realized that what I really wanted to do was create beautiful images of beautiful things, so I went back to school to study studio photography and lighting. It was the best decision I’ve ever made, and I’ve been a commercial product photographer ever since.

What I really wanted to do was create beautiful images of beautiful things

What specifically do you photograph?

I help businesses of all sizes to showcase their products with compelling imagery. I shoot apparel, accessories, and jewelry both on and off-figure. I also shoot food, consumer and industrial products.

Why should someone hire a product photographer to take product photos as opposed to taking them in house?

Great question!  With the advent of digital photography, almost anyone can take a picture of their product to use for P.R. and advertising purposes.  The difference between you and a professional product photographer taking your photos is that the professional has been trained to light your product in a way that will enhance it’s key features and make it more appealing to your customers.  I’m a do-it-yourselfer at heart, so I understand the desire to create your own brand imagery, but I also understand that hiring a professional can save you both time and money in the long run and allow you to do what you do best.

What is the difference between a product still and a lifestyle or catalogue image?

In general, a product shot is a clear and simple representation of the product. For apparel, it could be a shot of a dress on a mannequin, rendered in 3D.  A product shot of a leather bag might be shot on a clean white background showing the features of the bag in several views.  The purpose of a product shot is to quickly communicate to the customer specifics about the item, such as the texture of the fabric, the drape of garment, or special features of the piece.  A lifestyle or catalogue image typically shows the product in use, and the photographer can be less concerned with the details of the item, and more concerned with the environment the product is represented in.  The purpose of these images is to create a mood or further a brand’s image.

What practical applications do product photographs have?

Product photography is everywhere! Businesses use images on their packaging and branding materials, in ads and marketing materials, on websites, and across all social media as well.  One great photo can be used across all of these platforms.

How do I find a good product photographer?

A good product photographer will have both an online presence and an online portfolio, and you should be able to find them by doing an internet search. Look at their portfolio for examples of their product work to better understand their level of expertise.  Before hiring anyone, ask what their specific product photography background is.  You’ll want to be sure that they have experience lighting and shooting products in a studio situation, because that’s the difference between a professional and you. I also recommend asking business associates for referrals, so you can benefit from their experience.

Is it important or necessary to be at the shoot?

The majority of my clients either ship or deliver their products to my studio and I send them images for approval before finalizing the shoot.  As long as both you and the photographer understand what’s needed, it’s not necessary for the you to be there during the shoot.

How do you photograph clothing pieces?

Apparel looks better when it’s photographed on a form, model, or mannequin, because it better shows the fit and shape of the garment, so I usually shoot it that way.  On occasion, I’m asked to shoot a garment flat, and it’s a challenge to make a great photo that way.  It’s impossible to light the garment and the background separately when shot this way, so the lighting on both suffers.  The trend for the past few years has been to photograph the clothing on a mannequin then do post-production work to remove the mannequin and render the garment in 3D.  It’s a great way to see the item without the distraction of a model.

How do you photograph accessories and jewelry?

Accessories can be photographed both on and off-figure.  For a straight product shot, the piece is put on a background and lit. Several shots may be required to showcase it’s specific details, like an inside pocket or chain handle on a bag, or separate shots of the front, side, and back views.  The way jewelry is photographed depends on the material it’s made of.  Smooth metals like silver or gold need to be surrounded by even lighting because their mirror-like surface reflects even the smallest thing around them.  Faceted stones in a piece call for a more direct light source.  Jewelry can also be shot on a set or on a form or model.

How much does it cost to get product photographs?

I think businesses might be surprised at how reasonable professional product photography can be.  Some product photographers charge on a per-shot basis, while others charge on a time plus expenses basis. I’ve seen quotes for as little as $10 and as much as $200 per shot, and anywhere from $500 to $3500 per day for product photography. While both the low and high numbers are a bit extreme, most product photographers will fall somewhere in between.  My studio has both an hourly and a day rate because I find that many of my client’s shoots do not require a full day to accomplish, so I use my hourly rate to save their budgets. If you are comparing quotes from several photographers and get some that are per-shot and some that are hourly/day rates, ask how many shots the photographer averages in an hour.  This will allow you to better understand the actual cost per item.  Also, it’s important to find out if silhouetting, retouching, or post-production work is included in the rate.

– See more at: http://www.prcouture.com/2014/11/04/q-a-with-product-photographer-nancy-lenore-of-photo-synthesis/#sthash.aoCDAT92.dpuf

Filed Under: Studio Blog

Snow Day!

February 3, 2014 By photosynth1

Every time it snows these days, I’m reminded of how much I used to love snow days as a kid. We’d get the news that school was closed and a huge cheer would rumble through my house. My mom would help us get all bundled up in layers upon layers of warm clothes and we’d go outside and roll around in the snow for hours. We’d build snowmen and forts, tunnels, and towers, and collect snow in a big bowl for snow ice cream. Every kid in the neighborhood would meet at the biggest hill for sledding and snowball fights. Eventually, we’d all drag ourselves back home to warm up in front of the fireplace with hot chocolate and marshmallows. I’ve always loved the look of freshly fallen snow on tree limbs and the graceful way icicles form from the melting snow.

Recently one of my students asked me to explain why snow always looks so grey in a photograph. This can also happen when taking pictures of a beach on a bright, sunny day. There is a simple explanation for this, and a simple solution as well. First, the explanation. Every camera, regardless of it’s make or model, is equipped with a light metering system of some kind. The job of the light meter is to read the amount of light coming through the lens in order to make a “correct” exposure. The meter tells the camera what in the scene is white (highlights), black (shadows), and mid-tones (everything in between). This works great in almost all lighting situations, but the camera runs into trouble when the meter is trying to read a scene that has lots of bright areas and little else, such as snow or sand. Since the meter’s job is to find a range of tones, it’s looking for something in the scene that is neither dark nor light to set as “middle grey”. It will pick a middle range point and set half the image lighter than that, and the other half darker. So, when the meter sees a field of white snow (or bright sand), it looks for a middle tone and can’t find one. The only thing left for it to do is tell the camera that the snow is the mid-tone, and render it grey. So, what can you do to make your snow white or your sand bright? The solution is simply to add more light to your image by changing the exposure. There are a few ways to do this easily. If you shoot on the automatic setting, you can add exposure by using the exposure value button, which usually shows up as a plus/minus button on the camera. Each click towards the plus side will add a bit more light to your image, giving you more exposure and white snow. (You can reduce the amount of light in any image that’s too bright by clicking towards the minus sign.) If you’re shooting in manual mode on your camera, simply add exposure by either increasing the aperture opening, or reducing the shutter speed. Both work equally as well.

Here are examples of the same scene shot with and without increased exposure value:
snowday2

snowday1

You’ll notice that the first image is correctly exposed…the snow is white and there is a good range of tones in the remainder of the picture. This image was made by adding +1 to the exposure value, which reset the mid-tones, making the snow appear white. The second picture was shot without any corrections, and you can see how grey the entire photo appears.

So, if you’re in the throes of yet another snowfall like I am here in the studio, you can wander out and take some beautifully exposed photos while you’re building your snow fort, or opt to wait until summer to test this out at the beach!

Filed Under: Studio Blog

  • Page 1
  • Page 2
  • Go to Next Page »

Primary Sidebar

Logo

CALL (845) 521-0107

Home
About
Blog
Contact

Looking for more? Photo Synthesis Photography is a full service commercial photography studio, offering beautiful images for packaging, products, apparel, industrial, and so much more.


Follow Us!

  • Facebook
  • Instagram
  • LinkedIn
  • Pinterest
  • Twitter

Copyright © 2025